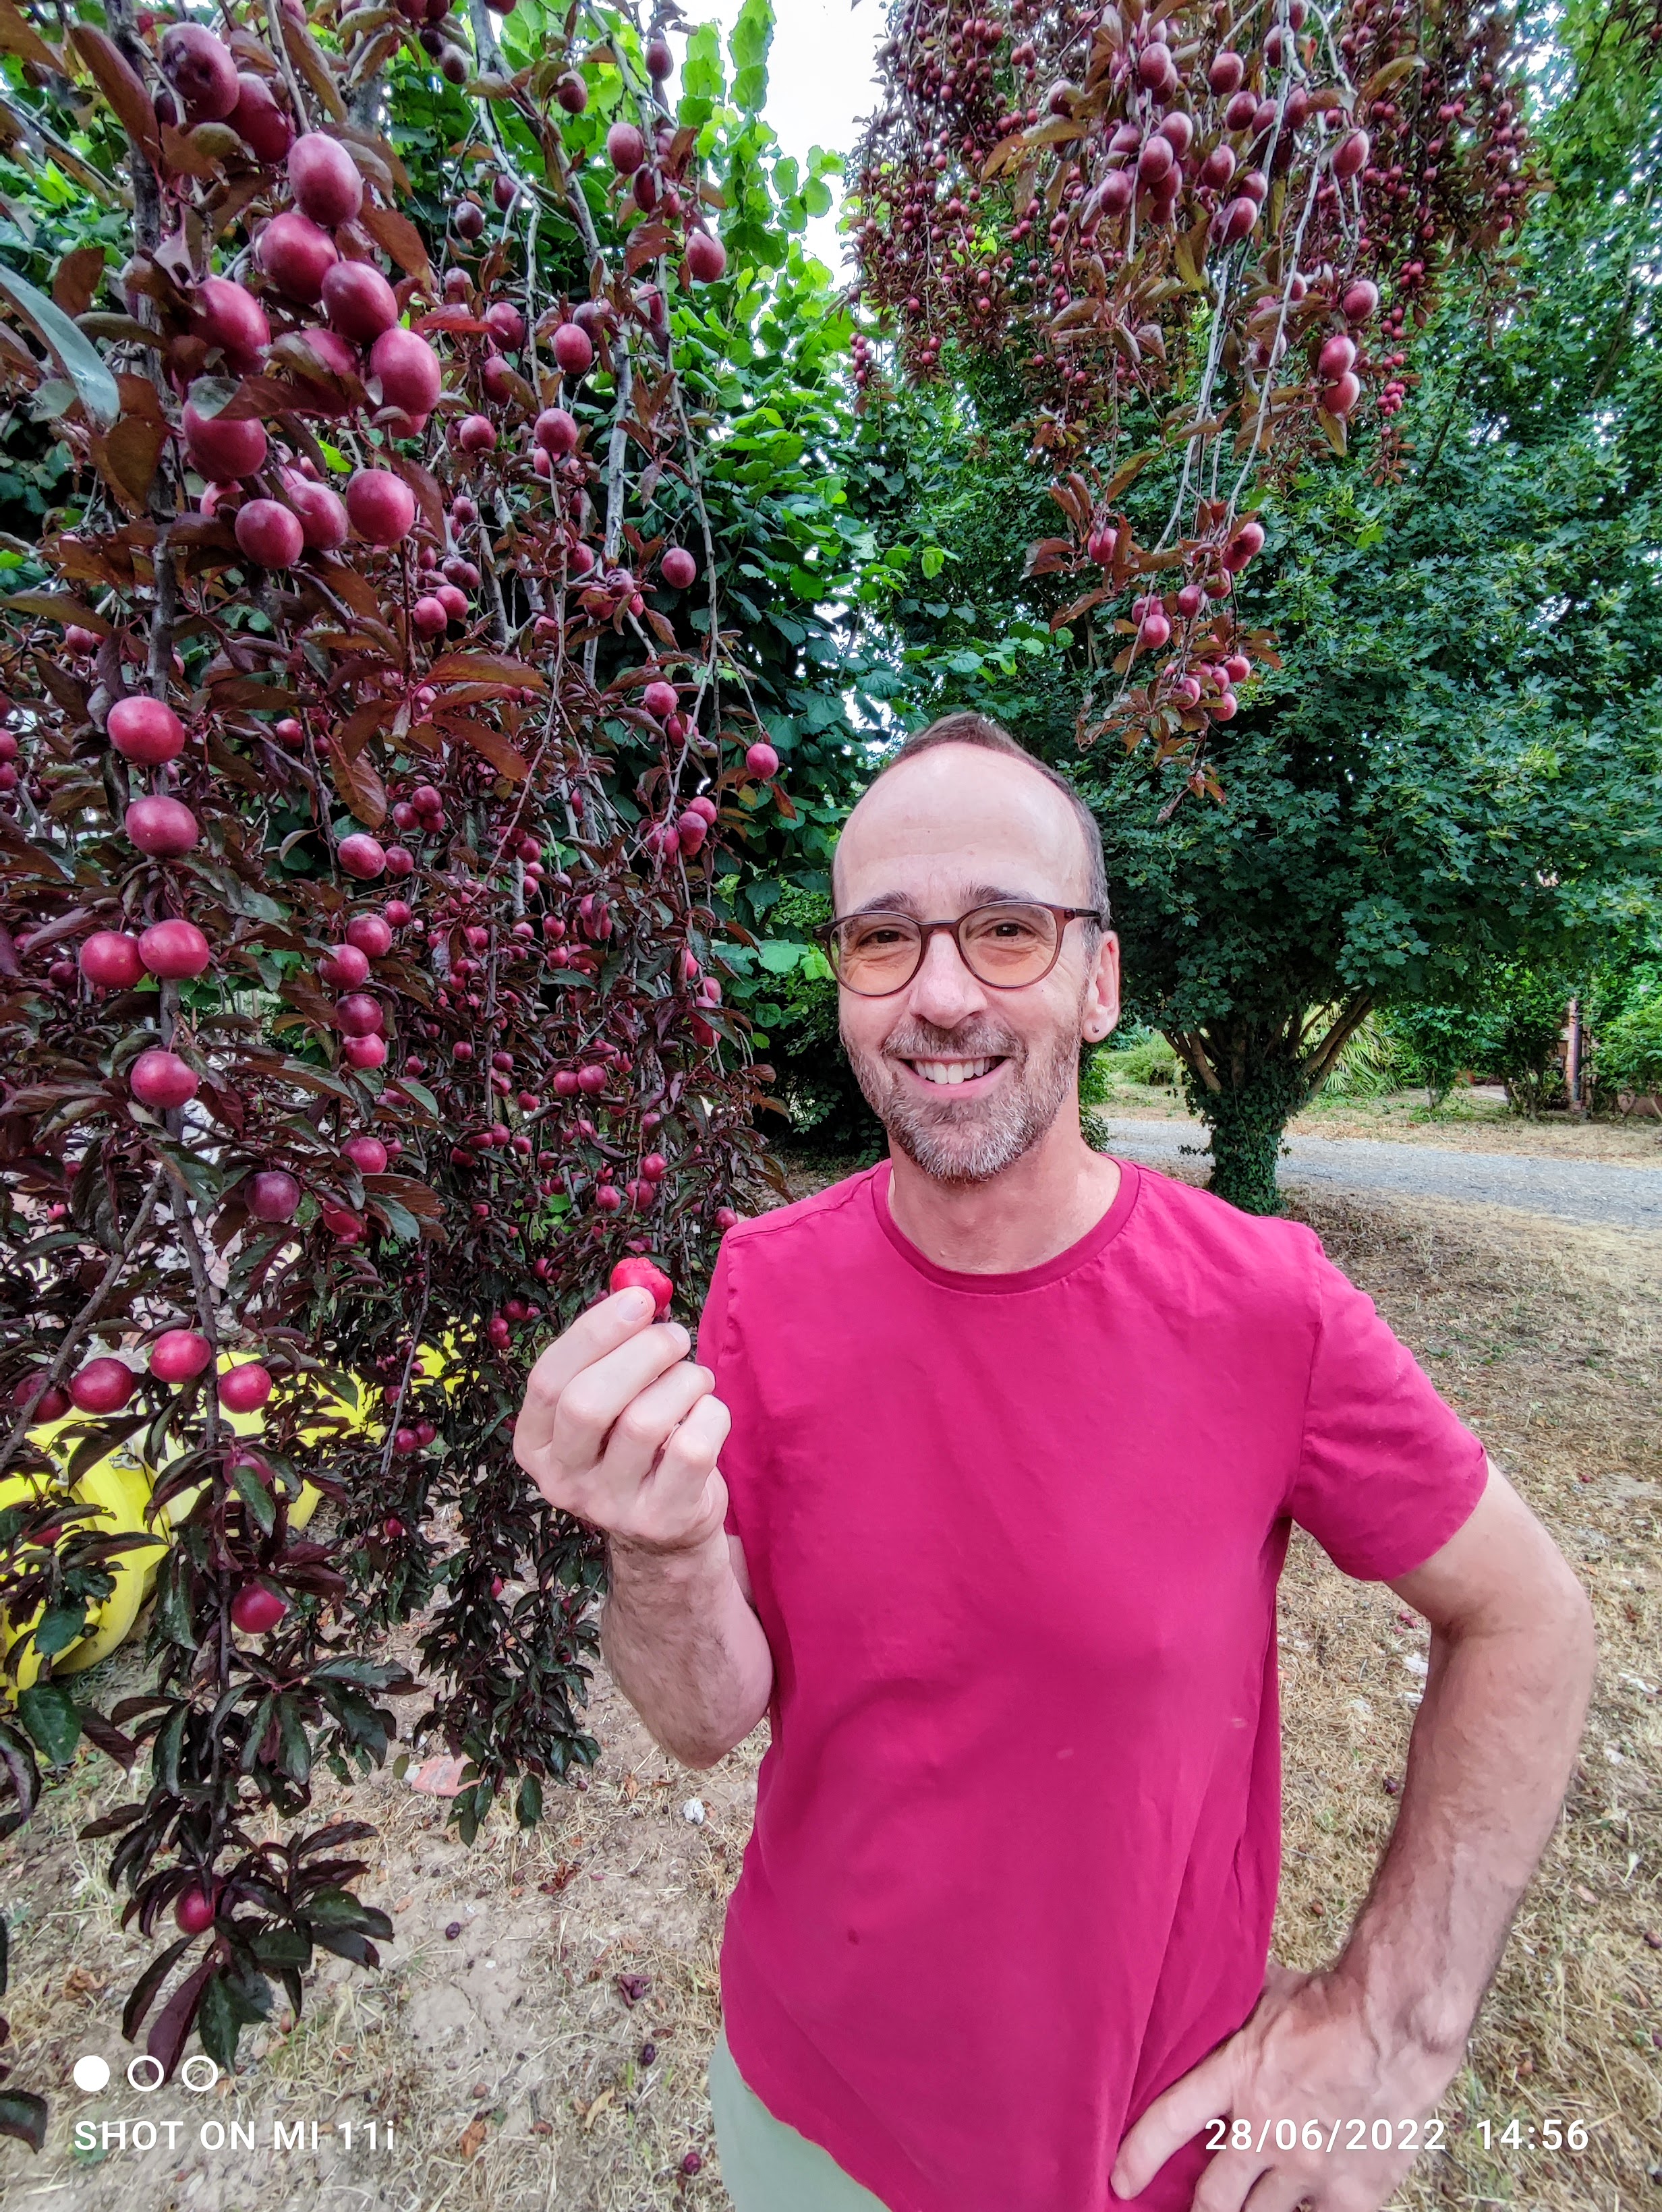
I wanted to cut down a tree in our yard because it was scraggly and sickly looking. As it turns out, it is a cherry plum tree. Let’s jam!

Said tree has a tire around its base to support it; moss barnacles on its branches; and it’s lopsided. I made my argument to cut it down, but Tom was feeling compassionate and wanted to wait until spring to see it blossom. I thought it was a type of Japanese maple due to its purple leaves. I must admit it was gorgeous in spring, but when it lost its blossoms, it was back to its ugly self. But then, mysterious bulbs started appearing. As it turned out, it is a cherry plum tree, and its branches are bowing down they are so loaded with the fruit. Who knew?! I didn’t but vistiting friend J.R. did because he whipped out his handy little app that identifies trees. Unfortunately, the fruit only ripened after he left but at least he was happy to help.
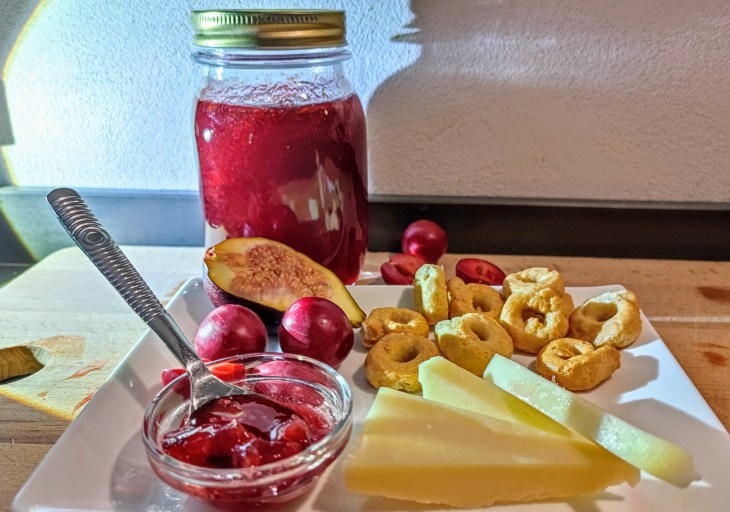
Cherry plums taste just like plums, but they are smaller like big cherries. This jam recipe may also be made with regular plums of any type. Unless you want to eat all the jam within a couple of weeks stored in the refrigerator, you will need to sterilize the jars and their lids and follow a canning process for long-term storage. Here is the easiest way to sterilize jars for canning. https://www.youtube.com/watch?v=UbQfLEca-5o

Arliano Update (Aggiornamento Arliano):
Any big renovation is bound to be a rollercoaster ride emotionally and financially, and we are no exception. The work progresses slowly, yet beautifully, even if we must share the workers with other clients. The bills are rolling in as expected. But the free fall of the week was notification from our bank that they have exhausted their government funds for the 50% energy saving bonus programs. Thankfully the 110% bonus programs are still intact (see previous renovation posts for more detailed explanations of the government bonus programs). I guess they have different pockets of money? All is not yet lost — we can open an account with another bank and pursue the 50% program reimbursements there. Yay? Maybe? Fingers crossed.


The garden is going gangbusters this year with the first tomatoes already harvested. The potatoes will be ready for harvest and storage in a few weeks, the beans are climbing up the teepee poles as they should, and the first zucchini blossoms have bloomed.
___________________________
Did you enjoy reading or making the recipe from this post? If so, please consider giving it a “like” or a comment. It would be nice to know you are out there and that my posts connect with you.
Plum or Cherry Plum Jam
Ingredients
- 1 kilogram (2.2 pounds) cherry plums or plums
- 1 kilogram (2.2 pounds or 5 cups) regular granulated white sugar
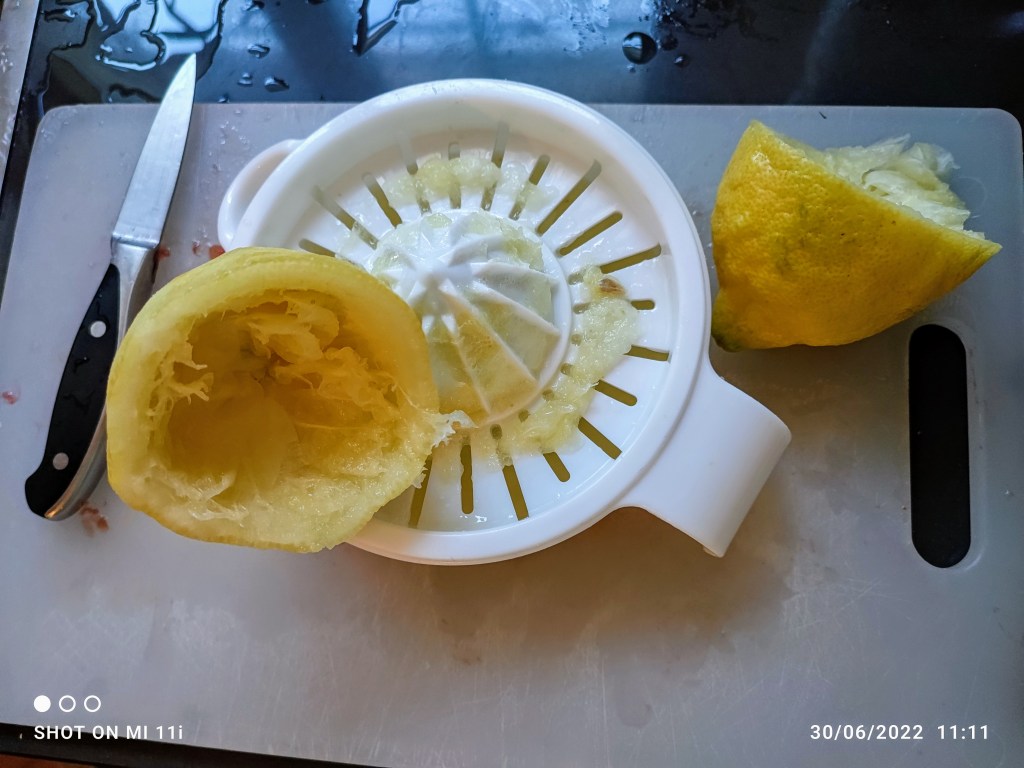
- 2 tablespoons freshly squeezed lemon juice
- 1 teaspoon of vanilla extract, or half of a vanilla bean, scraped (optional)
Directions
- Sterilize your jars and let them cool (see headnote for link)
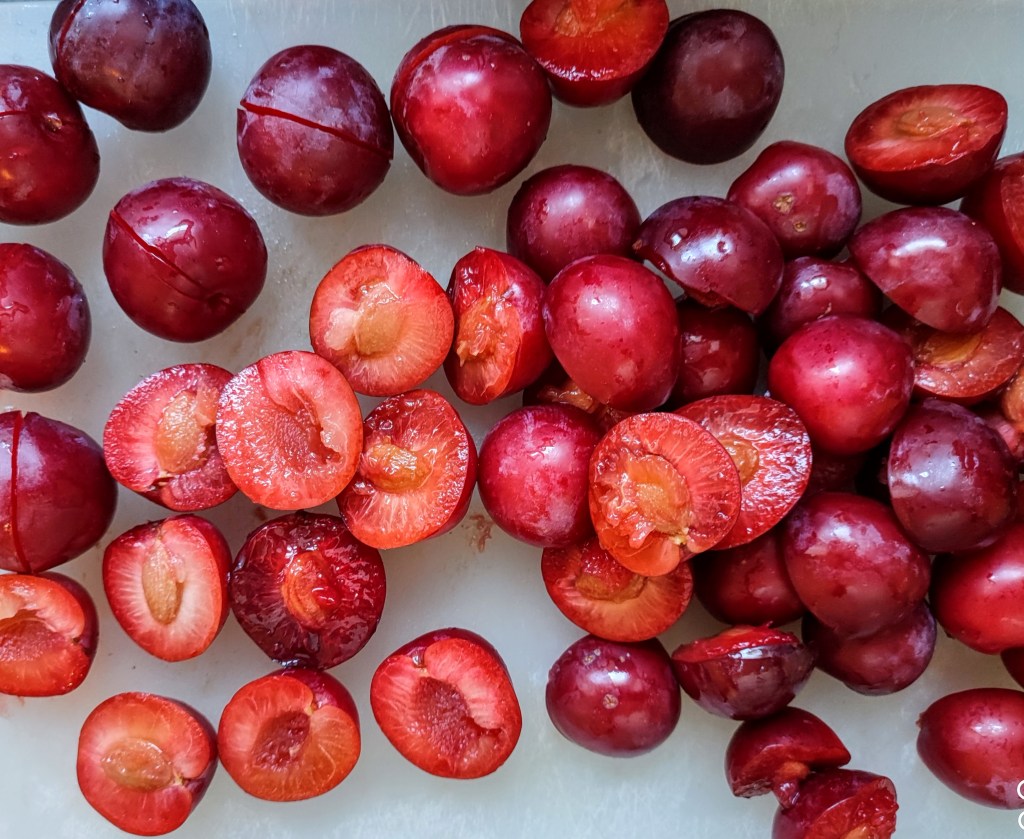
- Count the number of cherry plums of plums you are using
- Either pit or place the whole cherry plums or regular plums into a large heavy bottom pot. Personally, I prefer to pit my plums ahead of time so I don’t have to worry about molten lava jelly later on. Bring the pan to medium heat. Heat until the plums burst and release some juices. Stir frequently so they do not burn on the bottom of the pan.
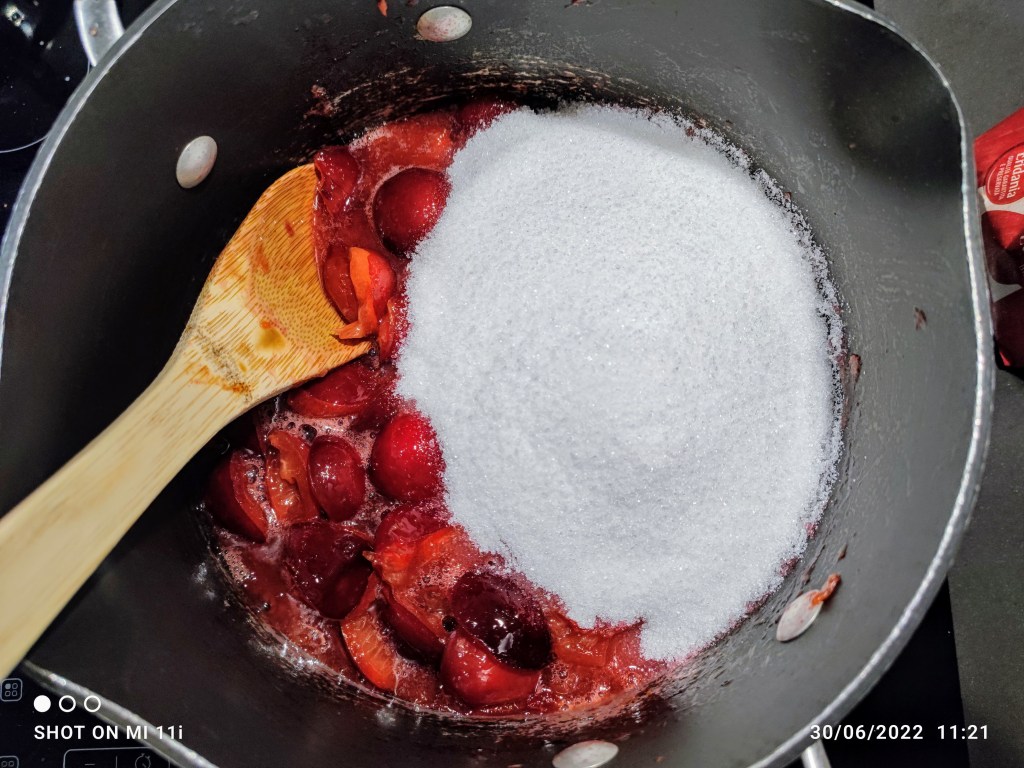
- Add the sugar and lemon juice and stir
- Bring the plum mixture to a boil, then reduce the heat to a hard simmer. If you did not pit your cherry plums or plums, smash them against the side of the pot with a wood spoon until they release their pits. The pits should fall to the bottom of the pot
- Heat until the jam reaches a temperature of 105 C (221 F). When I make this, the temperature climbs quickly to about 218F, and then it seems to take forever and a day before reaching 221. Be patient. You can go as high as 225 if you prefer your jam to be more thickly set. If you do not have a thermometer, place a small plate in the freezer. When the jam in the pot has noticeably thickened, place a small spoon of it on the plate from the freezer. If it looks set like, well… jam, it is done. If it is too runny, continue cooking it and repeat the test every few minutes. Remove from the heat and stir in the vanilla, if using
- As needed, strain the jam in a loose colander and count the pits to ensure that you have removed them all. I leave the skins in my jam. If you prefer jam without the skins, you can use a colander or a food mill to remove them
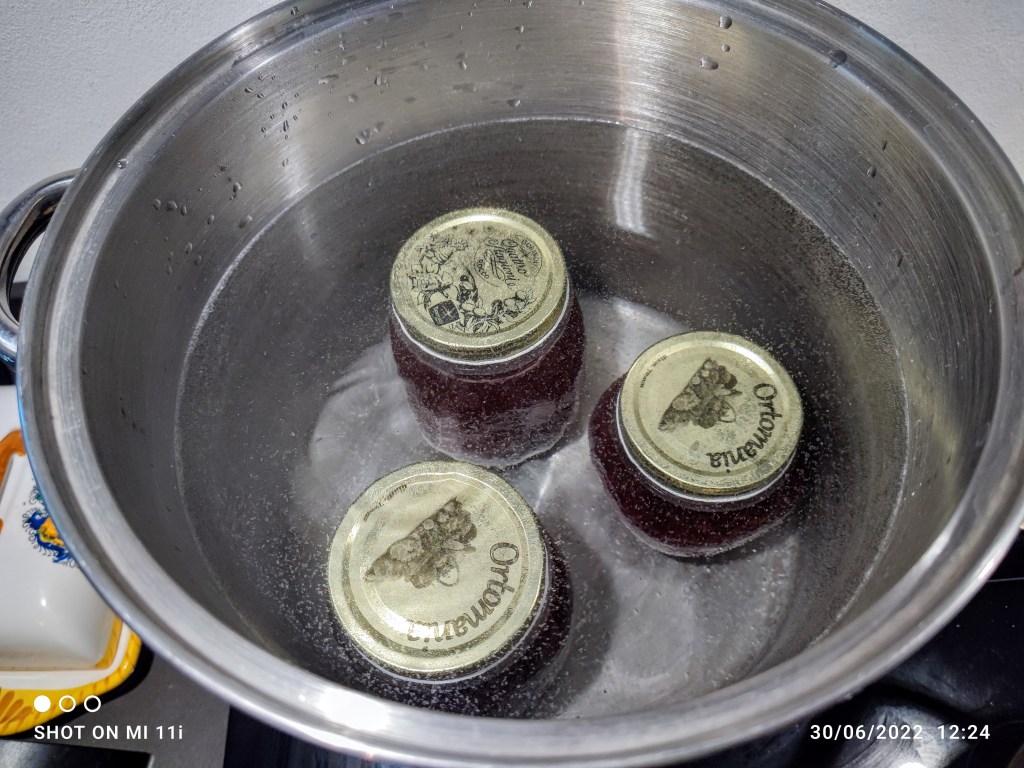
- Ladle the jam into the jars leaving 1 cm (about 1/2 inch) at the top. Place all the jars into a very large pot and fill the pot with hot water, covering the jars by 4 cm (about 2 inches). Bring the water to a boil and boil for 15 minutes. VERY carefully remove the jars and let them completely cool on your countertop. Rubber tip grip tongs, or waterproof silicon oven mitts work well to remove the jars. Be very careful not to let water touch your skin

Is Tom next to the cherry plum tree? I was hoping there would be a photo! Next spring include a photo when the tree has blossoms.
LikeLike
Yes, that is Tom. If you click on any photo it should expand if you want to see it more closely.
LikeLike
I just realized the bush/tree we planted 3 years ago was this same thing. I made the cherry plum jam tonight. I didn’t pit mine prior to cooking and that was a booger. I will the next batch. I only tasted it warm so far but is delicious. Can’t wait for it to cool.
LikeLiked by 1 person