
I love my mom’s cranberry nutloaf — the only problem is that I don’t really like cranberries. The cake itself bursts with orange flavor from juice and zest, and it goes well with sweet berries, chocolate chips, or just by itself. I made this one with raspberries and walnuts.

The process for this loaf cake is a little strange. Instead of a traditional butter, sugar, egg creaming method, this starts off more like a pie dough. The original recipe called for vegetable shortening which needed to be worked into a flour mixture. I replaced the shortening with cold butter but kept the process the same (shortening is difficult to find where I live, plus I’m not a big fan of hydrogenated oils).
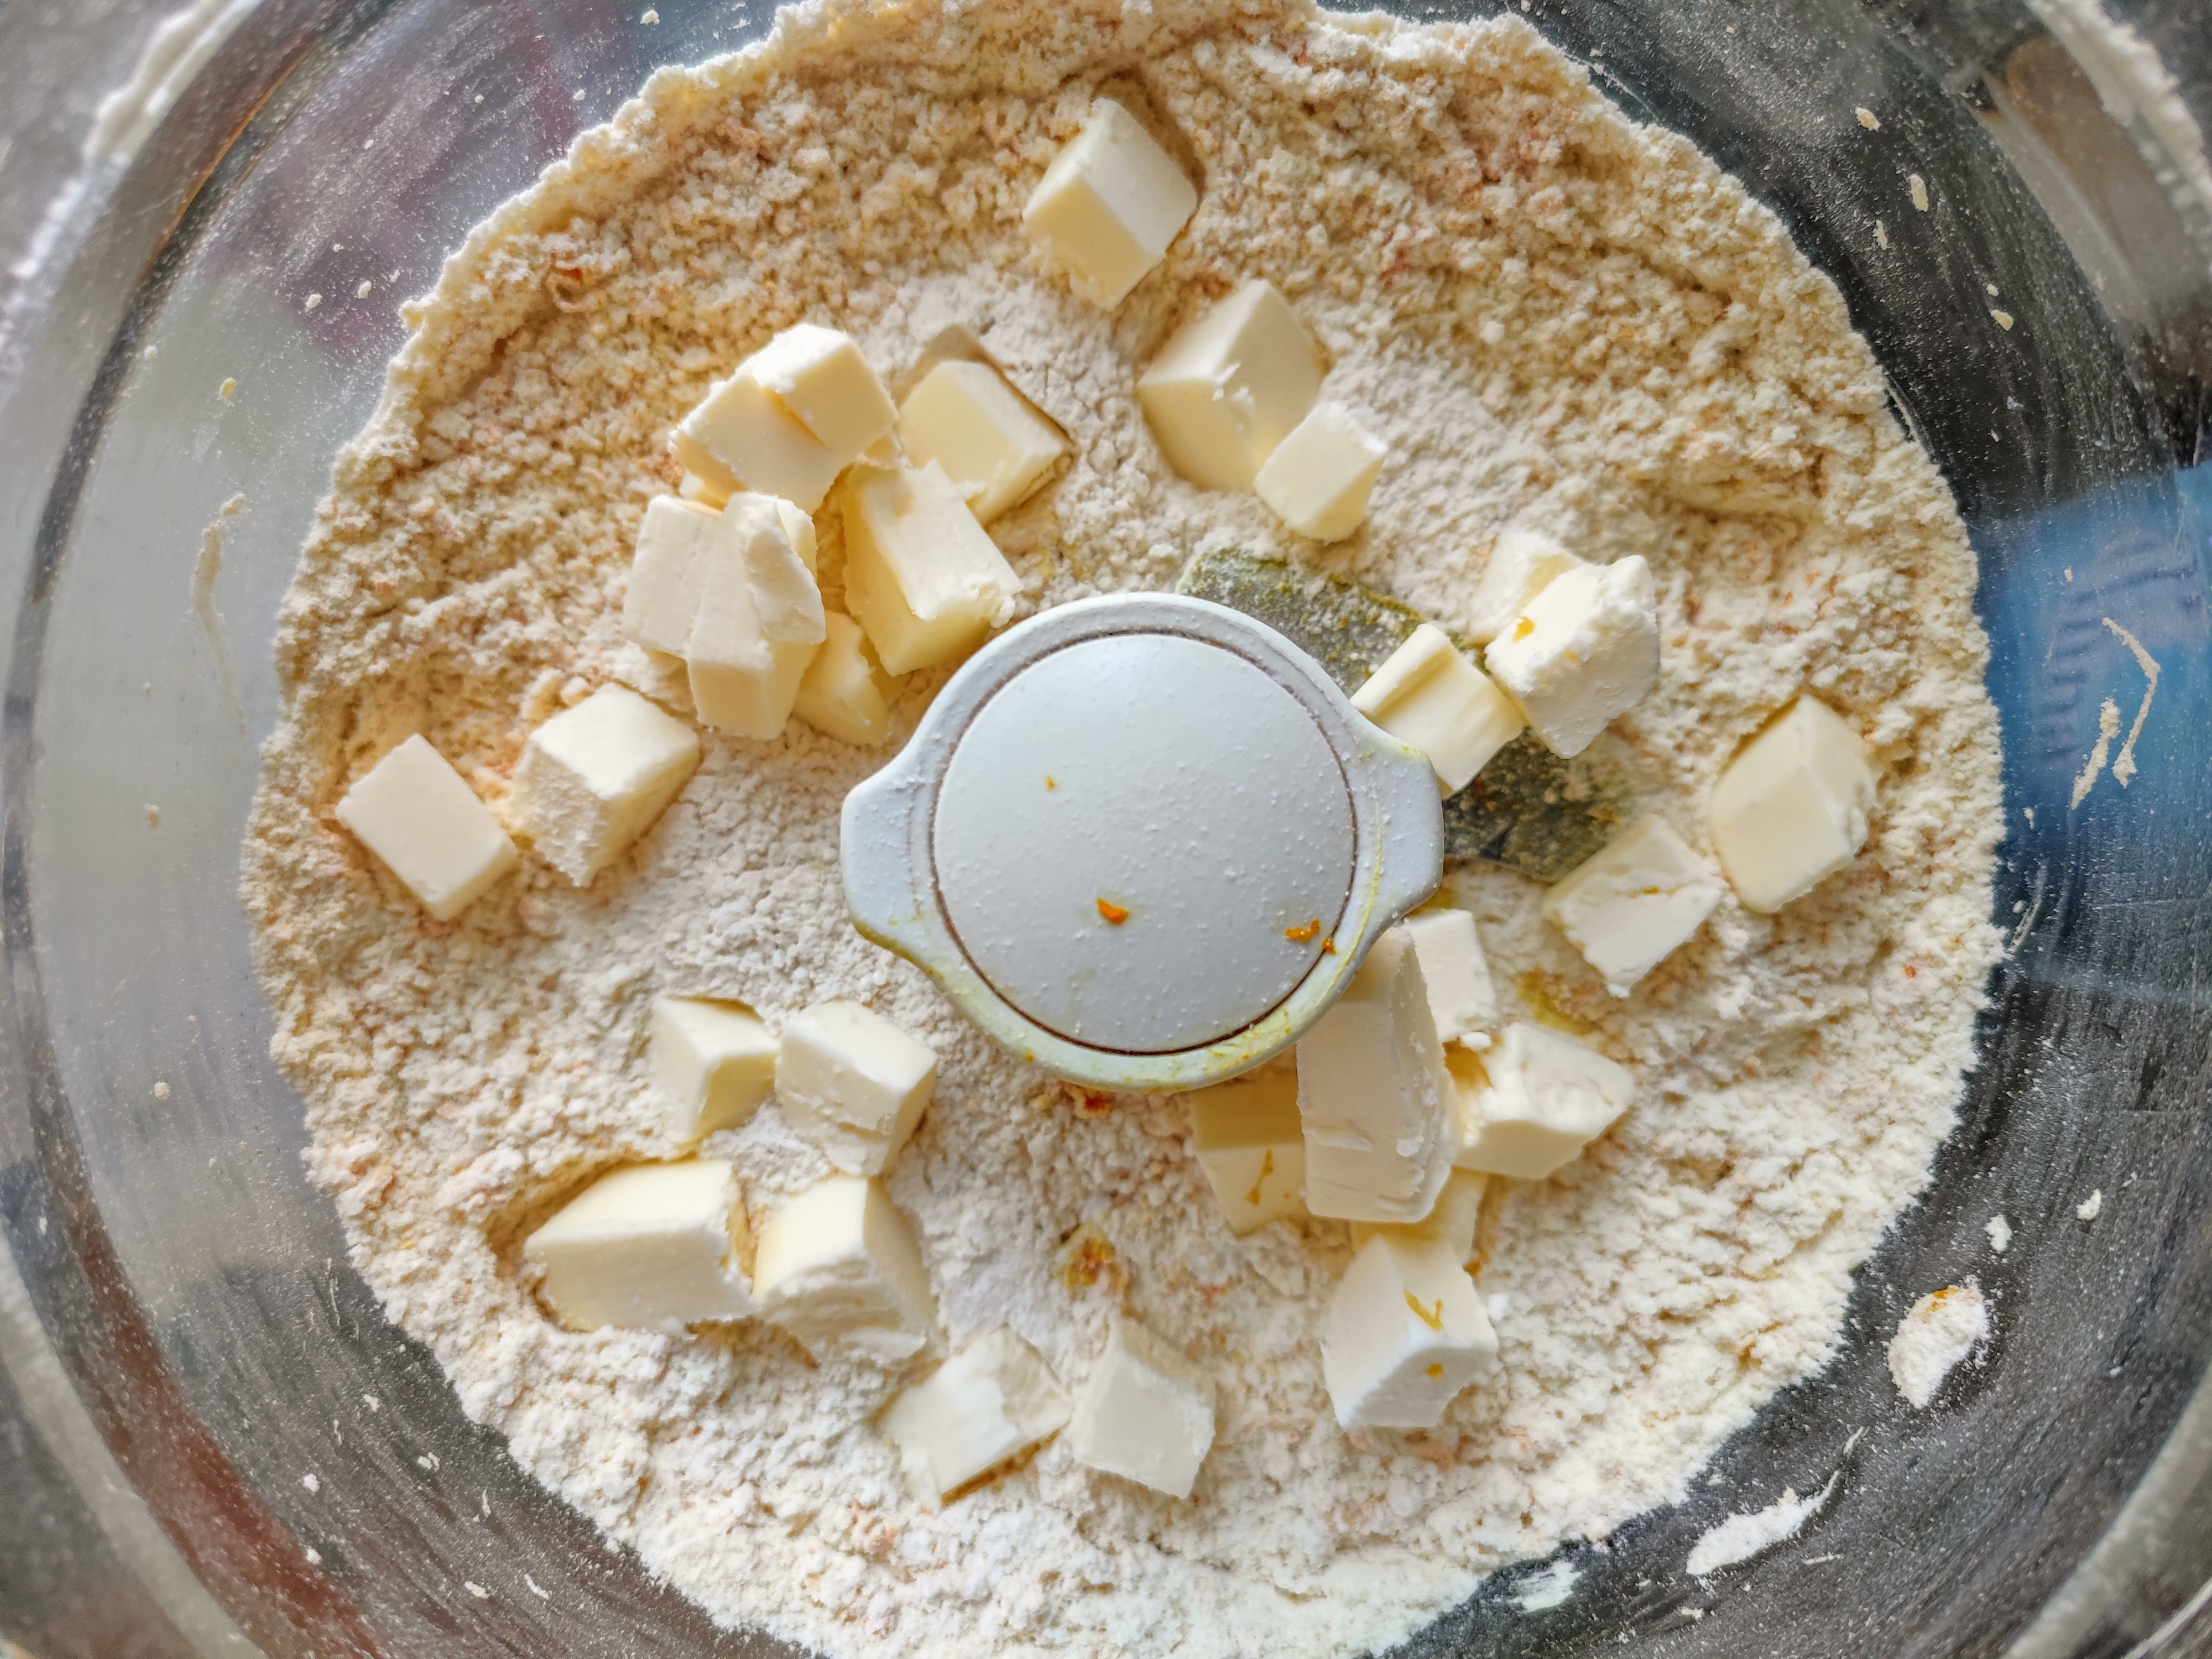

This cake may either be made by hand, a traditional pastry blender (check out the handheld wire tool in the ingredients photo if you don’t know what one is), or pulsed in a food processor, if you have one. Regardless, from my mom’s kitchen and mine to yours, I hope you give this a try — it’s truly scrumptious (at least the construction team working on our home renovation think so!).
Arliano Update (Aggiornamento Arliano):
Tubes and scaffolding everywhere! That’s the renovation story for these past two weeks.


In gardening news, the garden (orto in Italian) has been freshly plowed and is ready for the first round of planting. I made a trip to the local nursery and picked up a couple dozen starter onions (including the famous sweet Tropea variety) as well as potato “seeds” and herbs. Potato seeds are sprouted potatoes cut in half, ready for planting. My San Marzano and Ox Heart tomatoes seedlings that I started a few weeks ago are doing well, and I just started germinating a couple types of sweet peppers. I’m not sure that I will grow hot peppers this year, as I still have a big bag of them in the freezer from last year.


The springtime air in Lucca is very sweet and fragrant now. Blooming in our yard now are the lilacs and orange tree blossoms. The mock orange shrubs will pop next and will make for excellent flower clippings by the bedside.

___________________________
Did you enjoy reading or making the recipe from this post? If so, please consider giving it a “like” or a comment. It would be nice to know you are out there and that my posts connect with you.
My Mom’s Cranberry Nut Loaf (with alternative ideas instead of cranberries)
Ingredients
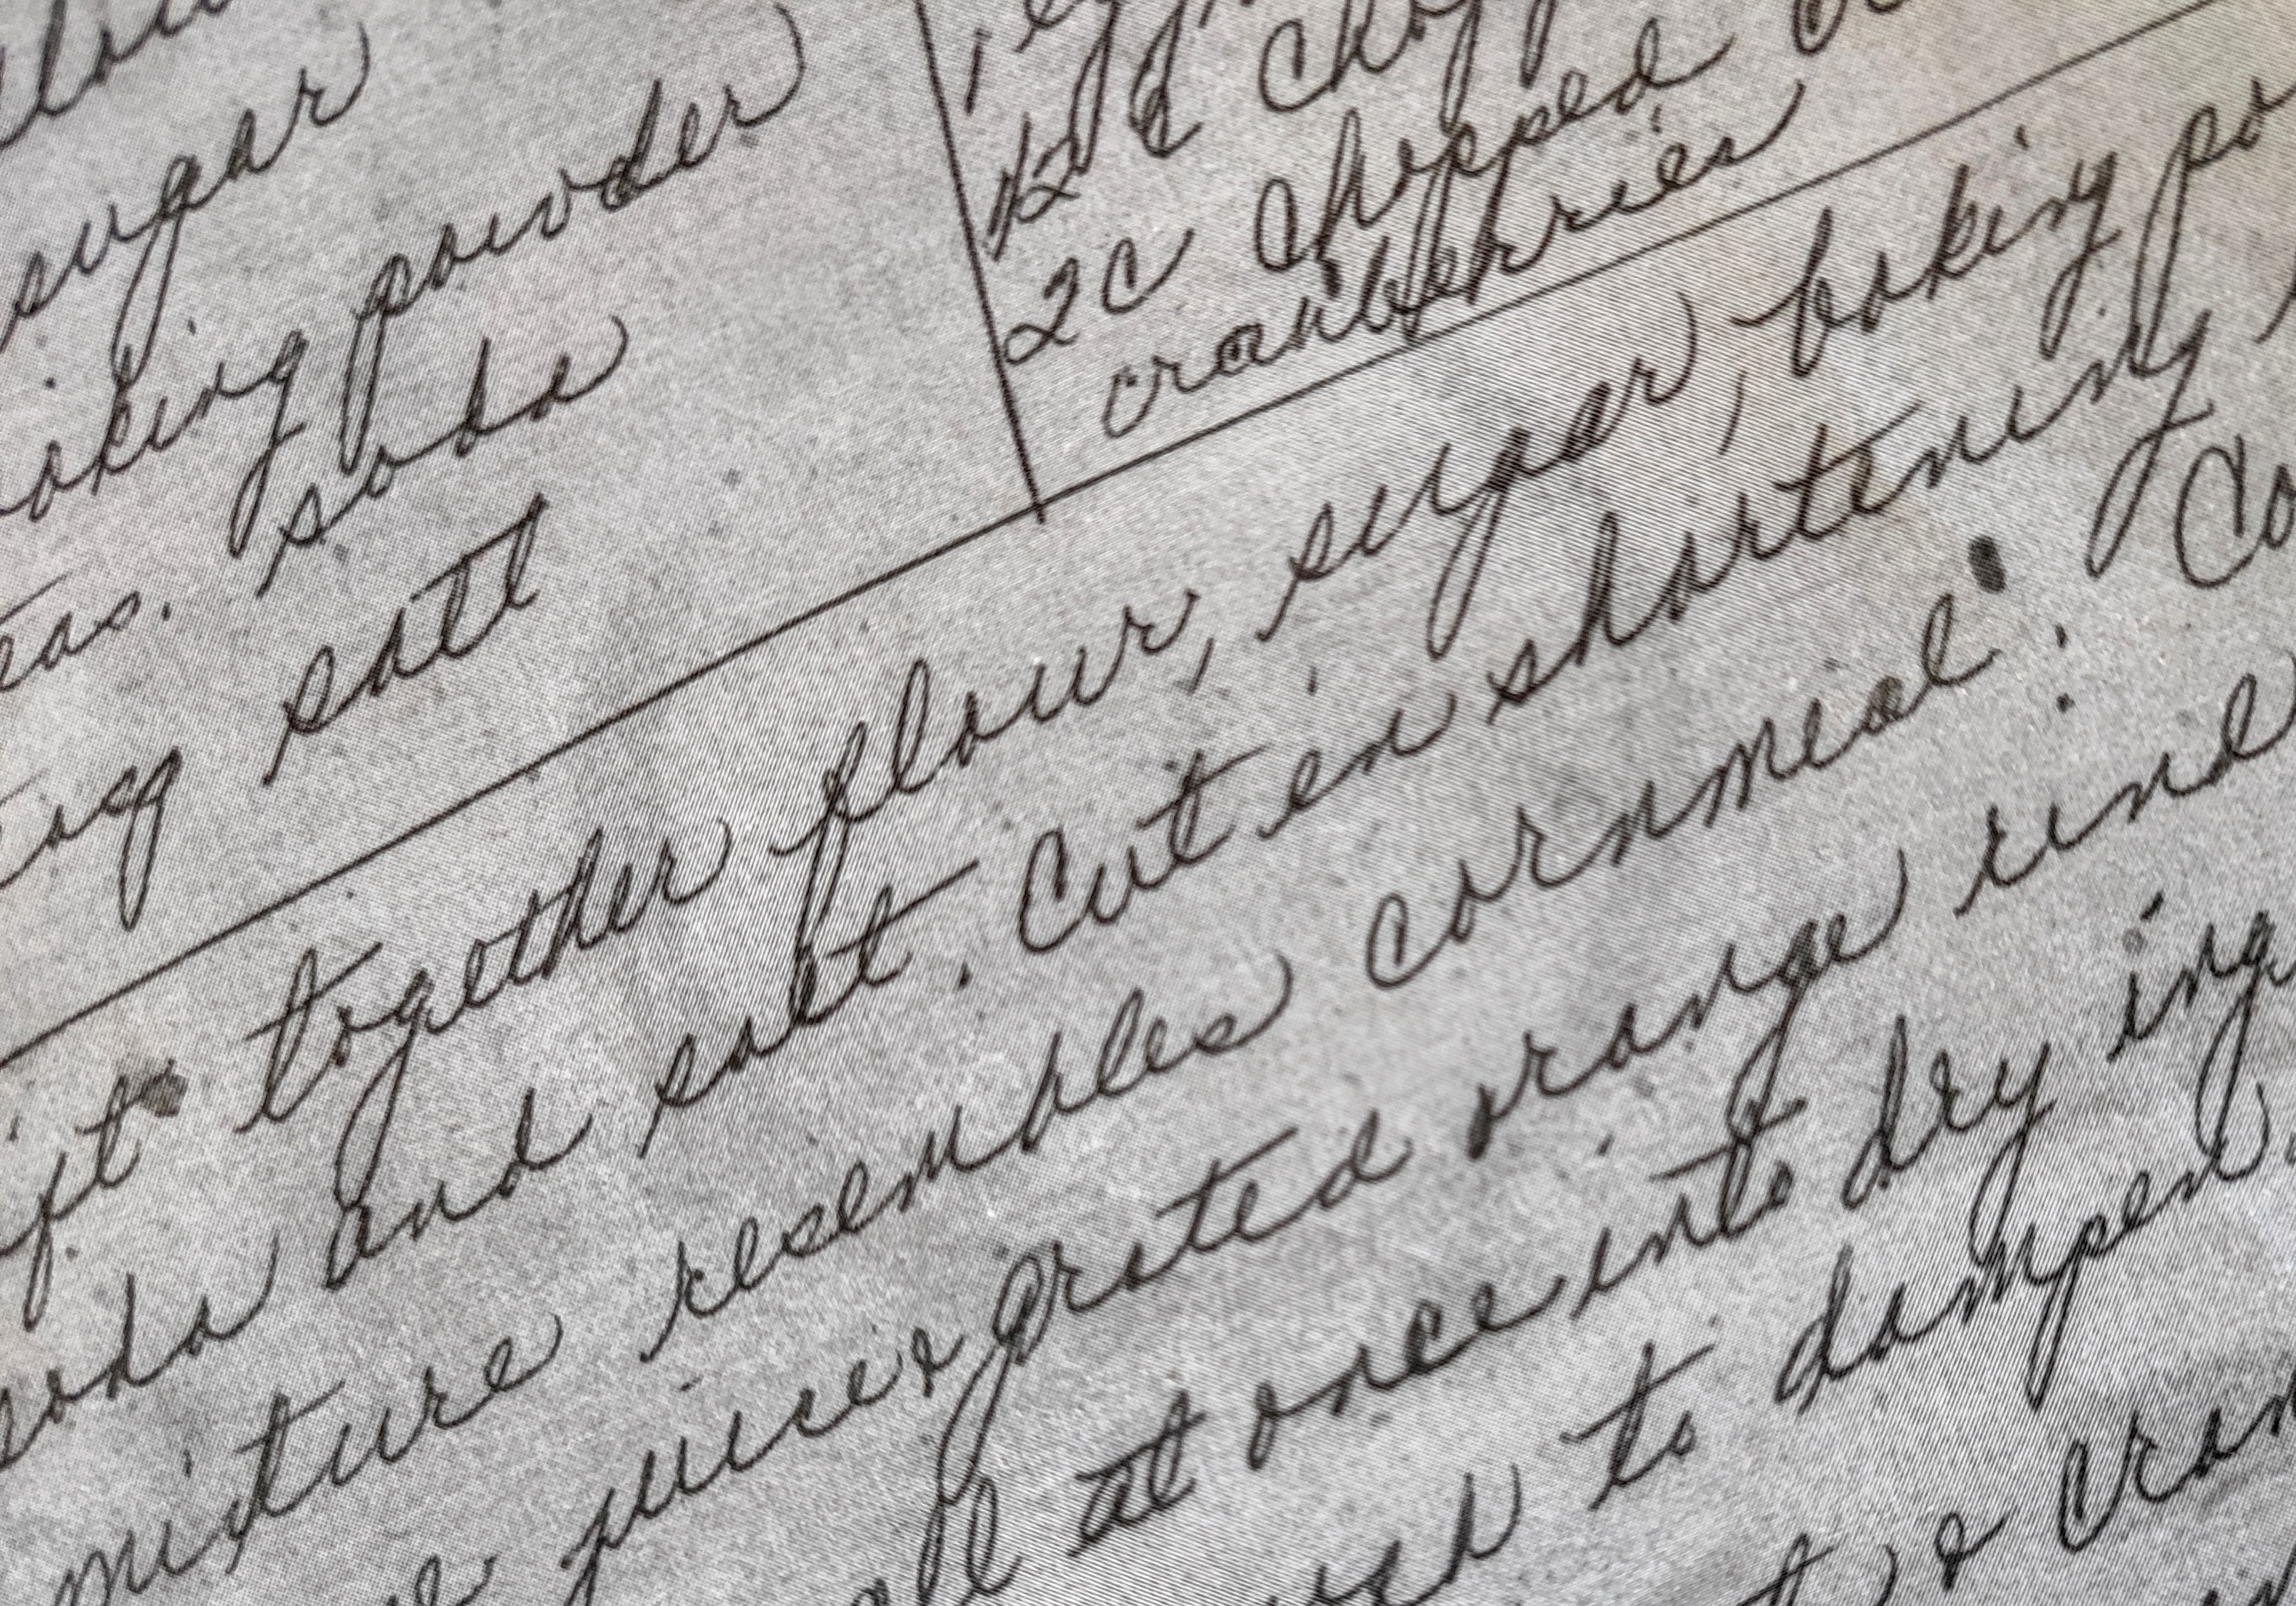
- 2 cups (260 g) all-purpose flour
- 1 cup (200 g) regular granulated sugar
- 1/4 cup (56 g) unsalted butter, very cold, cubed
- 1 large egg, beaten
- 1/2 cup (75 g) chopped nuts (walnuts, hazelnuts and almonds work particularly well)
- 3/4 cup (177 ml) orange juice, freshly squeezed
- 2 tablespoons orange zest (from the oranges you squeezed from the juice. Zest before juicing!)
- 1 1/2 teaspoons baking powder
- 1/2 teaspoon baking soda
- 1/2 teaspoon kosher or sea salt (not iodized table salt)
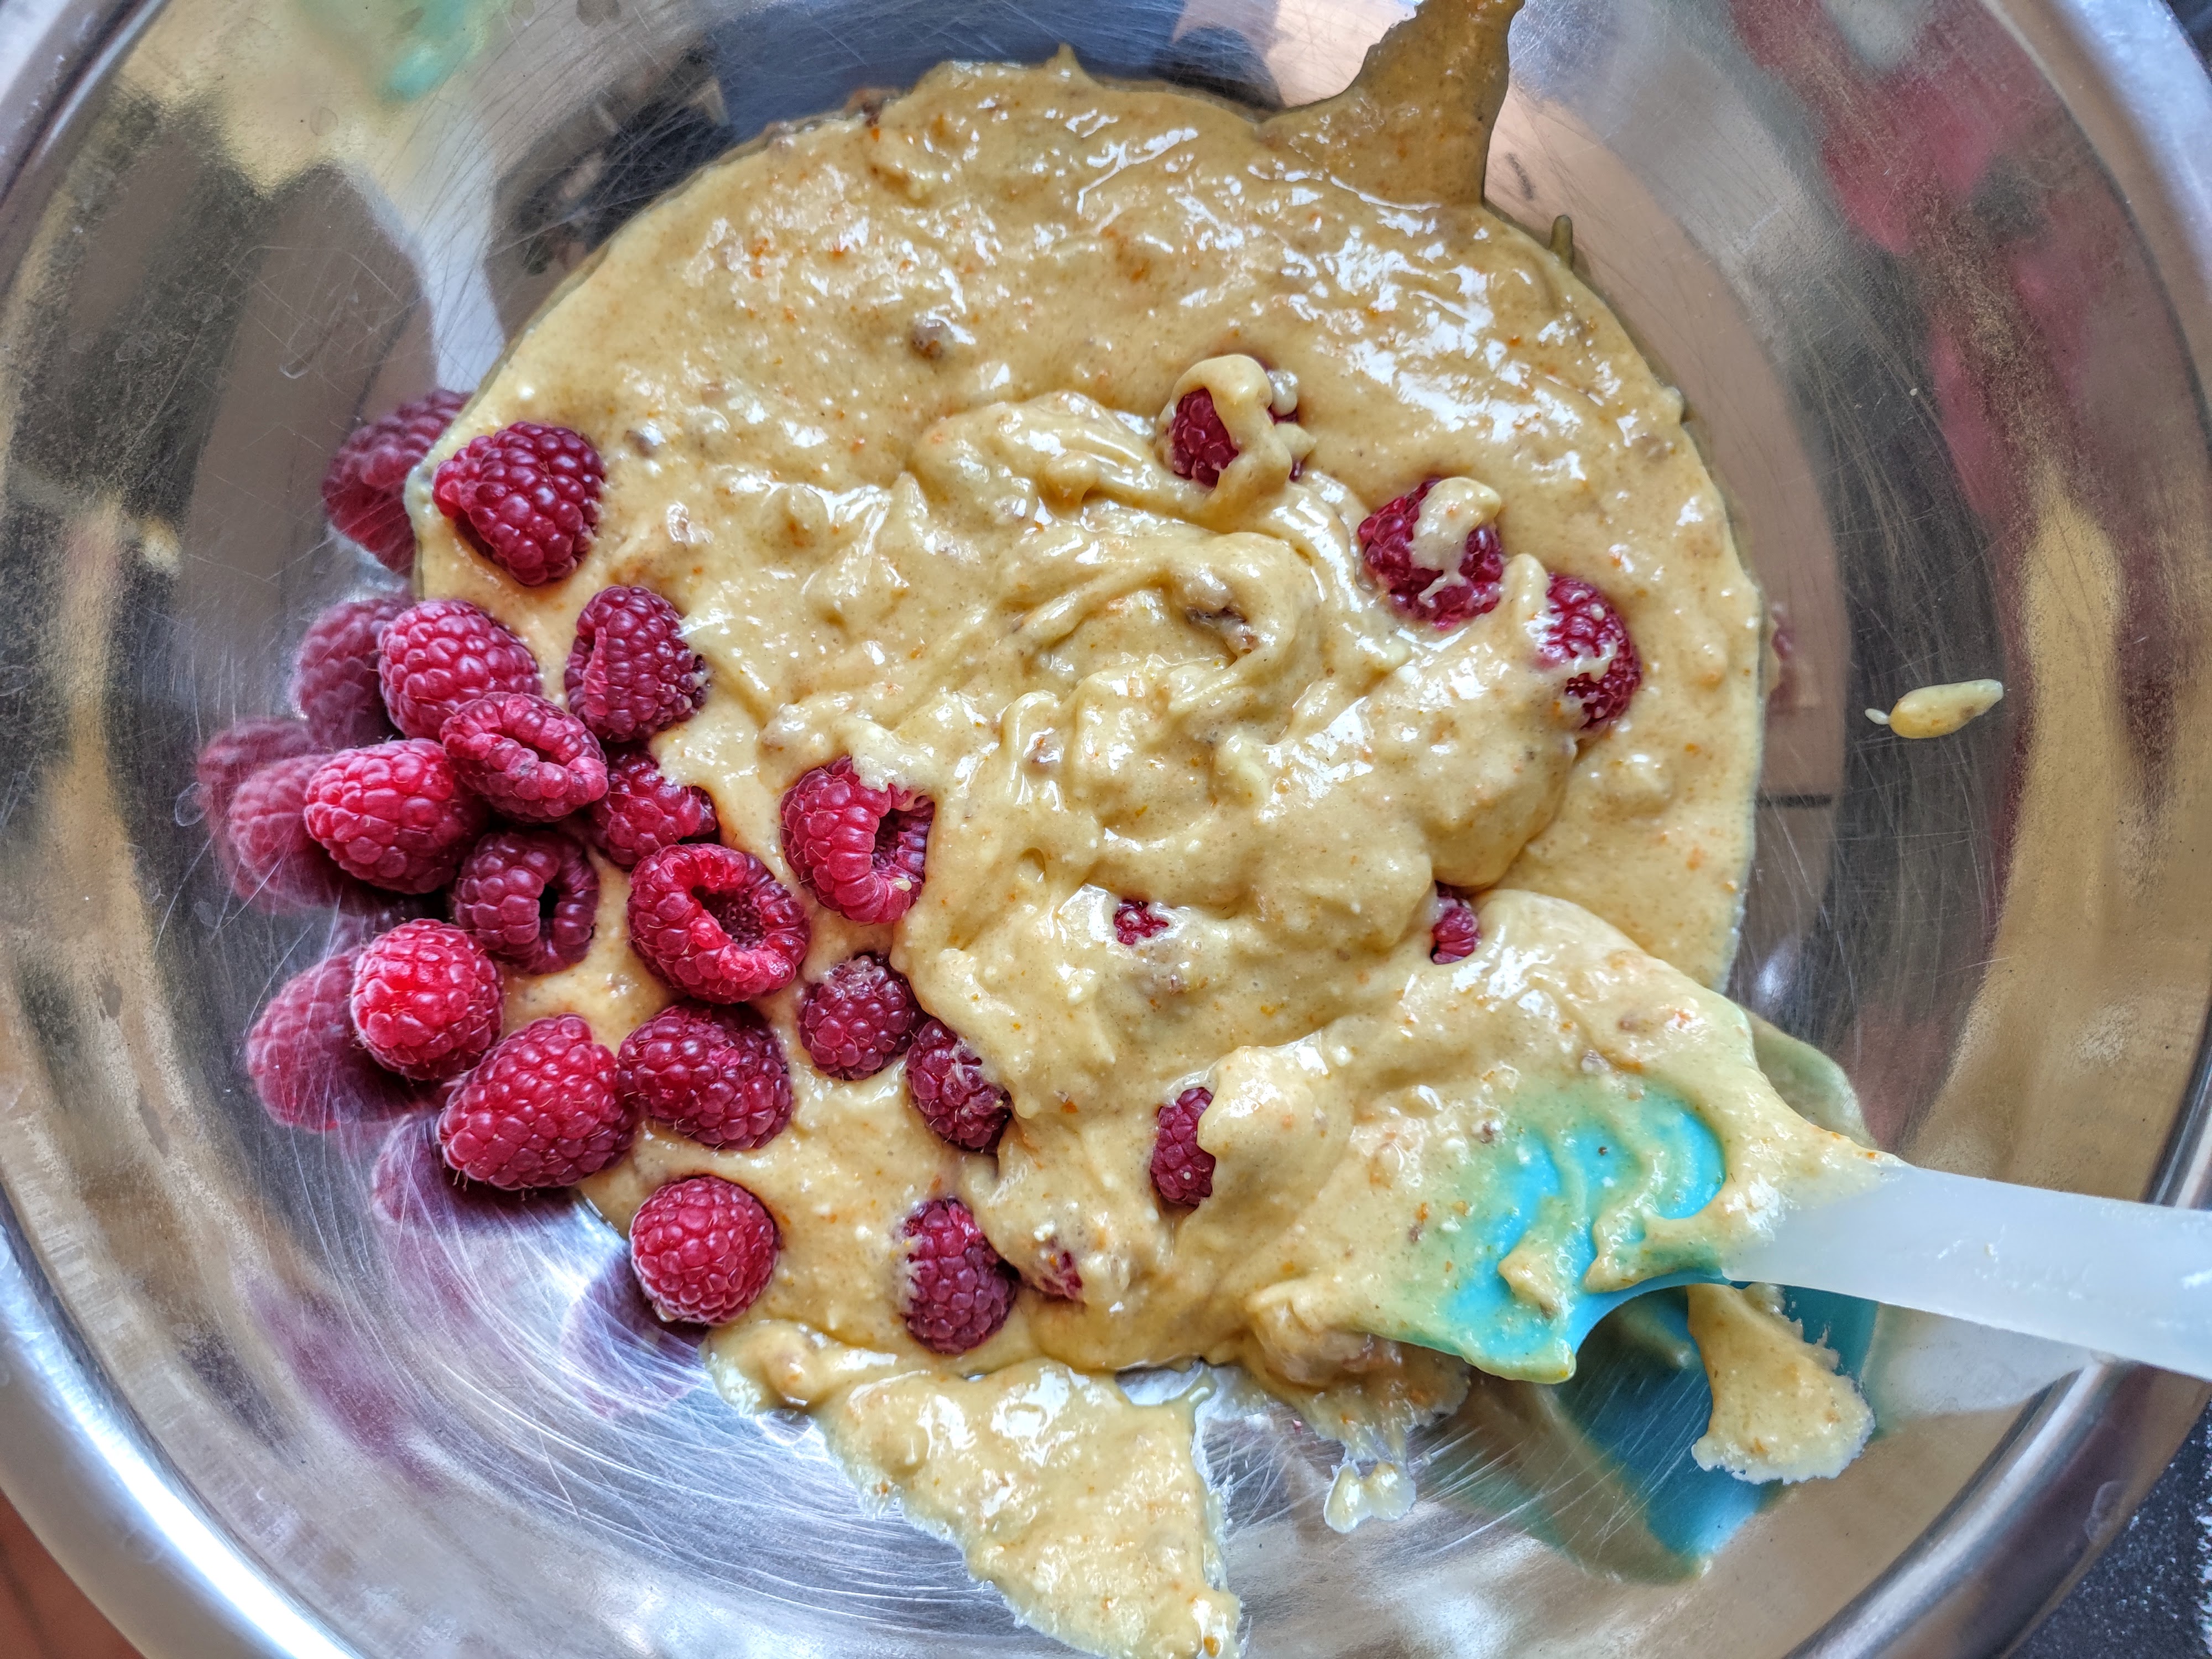
- Mix-ins: 1-pint raspberries, blueberries, or blackberries. Alternatively, you can use two cups of chopped cranberries as per my mother’s original recipe, or 1 cup of dark chocolate chips
Directions
- Pre-heat oven to 350F (180C)
- Butter and line with parchment paper or aluminum foil a standard size loaf pan. Set aside
- Sift together the flour, sugar, baking powder, baking soda and salt
- In either a food processor or a bowl, work in the cold cubed butter until the mixture resembles cornmeal. If you are doing this without a food processor, you can use an old-fashioned pastry blender (the tool shown in the ingredients photo) or by hand, as if you are making pie dough
- Add the orange juice, orange zest and the beaten egg to the flour mixture. If using a food processor, pulse until the mixture is fully dampened. If mixing by hand, use a rubber spatula or a wooden spoon
- Fold in the nuts and your mix-ins of choice (I used a pint of raspberries because they are a bit tart like the original cranberry-based recipe, but without the bite.)
- Evenly spread the batter into the prepared loaf pan and bake for 60 – 65 minutes (Check often during the last 15 minutes of baking time since all ovens are calibrated differently.) You may need to loosely tent the pan with foil if it is browning too much. It is done when a toothpick comes out clean. After about 30 minutes of cooling, remove it from the pan and cool it completely on a cooling rack

Omg this looks delicious! I’m going to try to make it! Thanks for the terrific recipe. Hope you are well a living your dream!
LikeLiked by 2 people
Trust me, it’s worth every calorie. Hope you’re well!
LikeLiked by 1 person